Most apartment buildings constructed before 2000 are running intercom infrastructure that was never designed to handle modern access control demands. A retrofit intercom system project sounds straightforward until you open the walls and discover four-wire audio-only wiring, proprietary panel connectors, and zero conduit space for new cable runs. Property managers who have done one of these projects will tell you the surprises stack up fast. This guide covers the full process from assessment to activation, including which wiring scenarios allow for a clean two-wire intercom retrofit and which ones require a hard reset on your cabling plan.
Table of Contents
- Quick Takeaways
- Why Old Intercom Systems Fail Property Managers
- Assessing Your Building’s Existing Wiring
- Two-Wire Intercom Retrofit Explained
- Wireless and IP-Based Retrofit Options
- Comparing Retrofit Approaches
- Step-by-Step Installation Process
- Common Mistakes That Kill Retrofit Projects
- Apartment Intercom Upgrade Features Worth Paying For
- Frequently Asked Questions
- References
Quick Takeaways
| Key Insight | Explanation |
|---|---|
| Wiring assessment comes before product selection | Choosing a system before knowing your wire count and gauge is the single most expensive mistake in a retrofit project. Always trace and test first. |
| Two-wire systems eliminate most rewiring costs | Modern two-wire intercom retrofit solutions can carry both power and audio-video signals over a single pair, making them ideal for buildings with legacy two-conductor runs. |
| IP-based systems require network infrastructure | Cloud-connected intercoms need reliable PoE switches or Wi-Fi access points near each door panel. Skipping this step causes chronic connectivity failures. |
| Tenant disruption window must be planned | A full apartment intercom upgrade in a 50-unit building typically requires 2 to 5 days of partial service interruption. Communicate timelines to tenants before work starts. |
| Door strike compatibility is a separate check | Your new intercom may support electric strikes, magnetic locks, or both. Verify your door hardware before purchasing to avoid a second trade on site. |
| Facial recognition and mobile credentials add long-term value | Systems that support biometric access or smartphone-based entry reduce key management overhead significantly for buildings over 20 units. |
| Code compliance cannot be skipped | Entry door access control modifications in multi-unit residential buildings often require permits and must comply with local fire egress codes. |
Why Old Intercom Systems Fail Property Managers
Analog intercom systems installed in apartment buildings from the 1970s through the early 2000s were designed around a single use case: pressing a button to buzz someone through a door. They were not designed for remote access, visitor logs, package delivery workflows, or integration with access control databases. When those systems start failing, replacement parts are often discontinued, and the repair cost approaches the cost of a full replacement anyway.
According to the National Apartment Association, deferred maintenance on building communication and access systems is one of the top three sources of tenant complaints in multifamily properties. Property managers who delay an apartment intercom upgrade typically face escalating service calls, broken handsets in individual units, and increasing security liability from door latch failures tied to faulty release circuits.
The business case for a retrofit is not just about modernization. It is about eliminating a recurring cost center while adding a feature set that supports resident satisfaction and reduces unauthorized building access. Buildings with functional, modern intercom and access control systems consistently command higher retention rates and attract quality tenants who prioritize security.


Assessing Your Building’s Existing Wiring
Before any product selection, a physical wiring audit is mandatory. Pull the cover off the existing lobby panel and trace where the cables run. You are looking for three things: wire count per home run, wire gauge, and total cable run length from the lobby panel to the farthest unit.
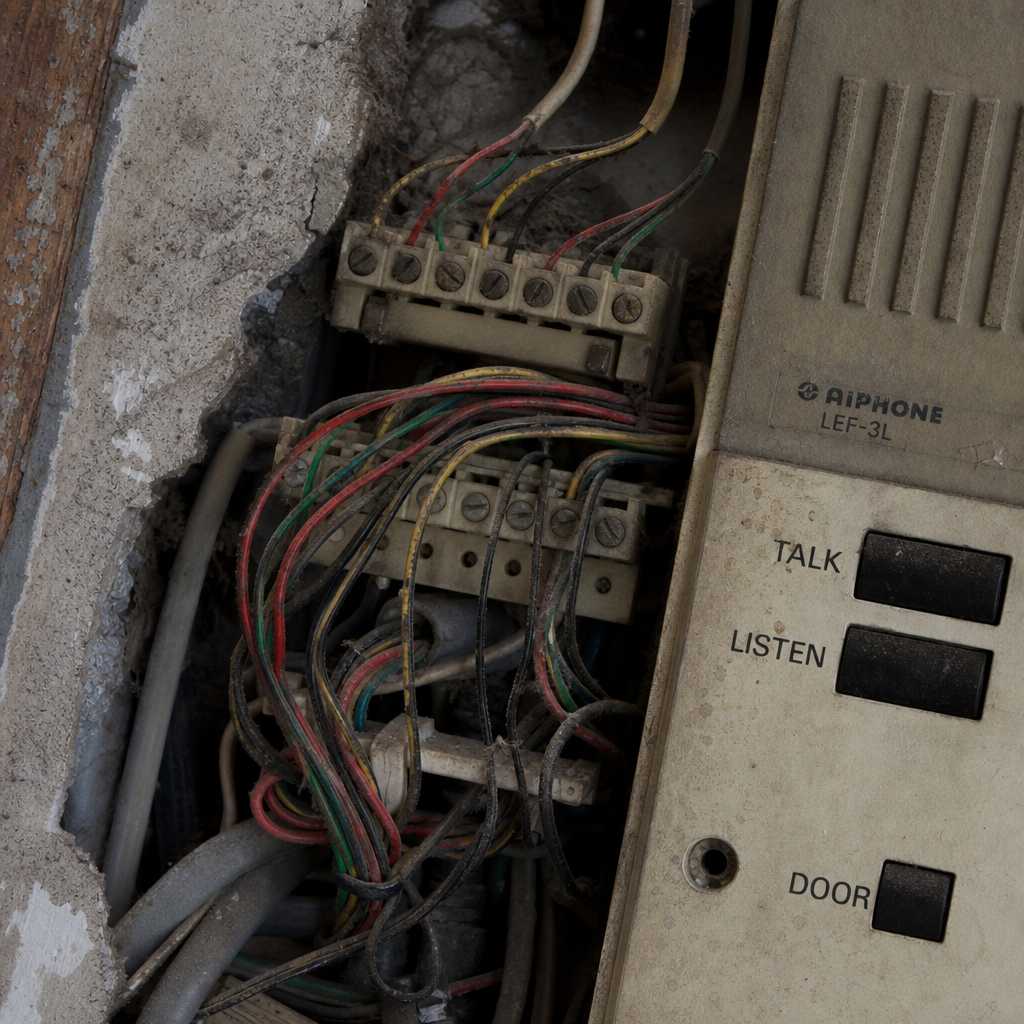
What You Will Find in Pre-2000 Buildings
Most older buildings fall into one of three categories. The first is a two-wire home run system, where each apartment has its own dedicated two-conductor cable running from the unit handset back to the lobby panel. This is the best-case scenario for a retrofit. The second is a multi-wire bus system, typically four or six conductors, where units share a common trunk line. The third, and most complicated, is a proprietary system with custom connector blocks that requires full re-cabling regardless of what modern system you choose.
Check the wire gauge carefully. 22 AWG is common and supports most modern two-wire intercom systems at runs up to 300 meters. If you find 28 AWG or thinner, voltage drop becomes a problem for any system that powers the handset over the intercom wire, and you will need either a booster or a re-cable on affected runs.
Tools Needed for the Audit
A basic continuity tester, a wire tracer, and a multimeter are sufficient for most assessments. Document every run length, label each cable at the panel end, and photograph the conduit entry points. This documentation becomes essential during installation and saves significant troubleshooting time.
Pro tip: Request building blueprints from the city if the property manager does not have them. Most municipalities archive construction documents for commercial and multifamily buildings, and these drawings often show original wiring schematic details that are not visible inside finished walls.
Two-Wire Intercom Retrofit Explained
A two-wire intercom retrofit is the preferred approach for buildings that already have two-conductor home run cabling to each unit. Modern systems in this category use digital signal multiplexing to transmit audio, video signal data, and DC power simultaneously over a single twisted pair. This eliminates the need to pull new cable in the vast majority of cases, which is where most of the project cost savings come from.
In practice, a quality two-wire system will accept existing cable with impedance between 50 and 200 ohms and compensate electronically for signal degradation over longer runs. The lobby panel connects to a central distribution module, which then fans out to each apartment via the existing cable. Apartment handsets or indoor monitors connect directly to the cable pair at the unit end, replacing the old handset with no additional wiring work required.
Video Capability Over Two Wires
The question property managers most often ask is whether video is possible without new cabling. The answer is yes, with a caveat. Two-wire video intercom systems using modern digital encoding can deliver real-time video at 480p to 720p resolution over existing cable. You will not get 1080p streaming over a legacy 22 AWG run of 200 meters, but you will get clear enough video for visitor identification, which is the primary use case.
Systems that use analog video encoding over two wires tend to degrade faster and are more susceptible to interference from elevator motors and HVAC systems, which are common in older buildings. Digital two-wire systems handle this interference significantly better. This is one area where spending slightly more on the system pays off operationally.
Pro tip: When testing an existing two-wire run for retrofit compatibility, apply 12V DC across the pair and measure the voltage at the farthest unit. If you read below 9V, that run will need a booster module or a direct cable replacement before installation.
Wireless and IP-Based Retrofit Options
Not every building has salvageable wiring. In cases where existing cable is damaged, undersized, or simply not present between the lobby and upper floors, wireless and IP-based systems provide a viable path forward for an apartment intercom upgrade.
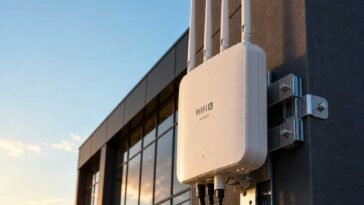
Wi-Fi and Cloud-Connected Intercoms
Cloud-based IP intercom systems connect the lobby panel to resident smartphones via an app. The resident receives a call notification on their phone, sees the visitor on camera, and releases the door remotely. This approach eliminates the need for in-unit handsets entirely, which removes one entire category of hardware installation and maintenance.
The tradeoff is network dependency. If the building’s Wi-Fi is unreliable or the lobby panel loses internet connectivity, the entire entry system goes offline. For this reason, IP-based lobby panels should always be wired via Ethernet to a managed PoE switch rather than relying on Wi-Fi at the point of entry. The resident-facing mobile connection can be Wi-Fi dependent, but the panel-to-network link must be hardwired.
Wireless Transmitter-Based Systems
For buildings where running Ethernet to the lobby is impractical, wireless transmitter systems bridge the lobby panel to an indoor receiver or gateway using licensed or unlicensed RF bands. UnikCCTV carries wireless intercom and transmitter solutions specifically designed for this scenario, allowing the entry panel to communicate with a central hub without any new conduit work.
Range and penetration through concrete are the primary variables. Modern 900 MHz systems outperform 2.4 GHz in concrete construction because the lower frequency penetrates dense materials more effectively. Always verify range specifications against the actual building construction type, not the open-air range figures listed on packaging.

Comparing Retrofit Approaches
Choosing between retrofit methods comes down to your existing infrastructure, budget, and the feature set your building actually needs. The table below compares the three primary retrofit approaches on the factors that matter most for a multifamily property decision.
| Retrofit Approach | Best For | Key Limitations |
|---|---|---|
| Two-Wire Digital Intercom Retrofit | Buildings with existing two-conductor home runs to each unit. Minimal installation disruption. Keeps in-unit handsets or monitors. Ideal for 20 to 200+ unit buildings. | Video resolution capped at 720p on longer runs. Requires wire gauge and condition verification before purchase. Booster modules needed for runs over 250 meters. |
| IP / Cloud-Based Intercom System | Buildings where residents prefer smartphone-based access. No in-unit handset hardware needed. Best for properties targeting younger tenants or short-term rental markets. | Fully dependent on internet connectivity and app functionality. Ongoing subscription fees with some platforms. Residents without smartphones need an alternative access method. |
| Wireless Transmitter-Based System | Buildings with no usable existing wiring and no practical path for new cable runs. Heritage buildings, temporary installations, or phased rollouts. | RF interference risk in dense urban environments. Range limitations in thick concrete construction. Fewer integration options for access control databases or biometric hardware. |
Step-by-Step Installation Process
A well-executed retrofit intercom system installation follows a consistent sequence regardless of the specific system chosen. Deviating from this sequence is where most projects encounter costly mid-job revisions.
Step 1: Complete the Wiring Audit and Label All Runs
Every cable run from lobby to unit must be tested for continuity, measured for resistance, and labeled at both ends. This step takes one full day in a 50-unit building and saves multiple days of troubleshooting later. Do not skip it.
Step 2: Select and Procure the System Before Scheduling Tenants
Once the audit is complete, you have the data needed to select the right system. Confirm door strike compatibility, power supply requirements, and whether any runs need booster modules. Order all equipment before booking the installation window. Waiting on a back-ordered panel mid-project while tenants have limited building access is a situation that generates legitimate complaints and sometimes legal exposure.
Step 3: Install the Lobby Panel and Distribution Equipment First
Begin at the control point, not the endpoints. Mount the lobby panel, wire the door release circuit, and connect the distribution module or main controller. Verify the system powers up and the door release functions before touching a single apartment unit. This confirms the core system is operational and isolates any unit-level issues to the handset or cable run, not the main panel.
Step 4: Connect and Test Each Apartment Unit Sequentially
Work floor by floor, connecting each indoor monitor or handset to the existing cable run and testing audio, video, and door release function before moving to the next unit. Document any failed runs and flag them for re-cable or booster installation as a second pass rather than stopping work on the main sequence.
Step 5: Configure Access Credentials and Resident Programming
Program unit numbers, resident name associations, and any access codes or mobile credentials before the system goes live. For buildings using biometric access or facial recognition systems, this enrollment phase requires resident participation and should be communicated in advance with clear instructions.
“Access control modernization in multifamily housing is no longer optional for properties competing in urban markets. Buildings that cannot offer controlled, auditable entry are losing residents to those that can.” – Multifamily Executive Magazine, 2023 Technology Report
Common Mistakes That Kill Retrofit Projects
A common mistake is purchasing a system before completing the wiring audit. Installers do this to save time on the front end and then spend twice as long troubleshooting incompatibilities on site. The audit is not optional overhead. It is the design phase of the project.
Another frequent error is ignoring the door hardware side of the equation. The intercom handles the communication and authentication. The electric strike or magnetic lock handles the physical release. These are two separate systems that must be electrically compatible. A 12V fail-secure electric strike and a lobby panel that outputs 24V on the relay will not work together without a relay interface module, and discovering this after both are installed adds cost and delay.
Failing to communicate with tenants before the project starts is a third mistake that creates unnecessary friction. A one-page notice explaining the upgrade timeline, the temporary service interruption window, and what residents need to do during enrollment resolves the majority of tenant pushback before it starts.
Pro tip: For buildings over 30 units, assign one staff member or building representative as the single point of contact for resident questions during the retrofit. This prevents the installation team from fielding interruptions during technical work and ensures consistent answers reach tenants.
Apartment Intercom Upgrade Features Worth Paying For
Not every feature offered on modern intercom systems justifies its cost in a multifamily retrofit context. These are the ones that deliver measurable operational value.
Mobile App Door Release
The ability for residents to release the front door from their smartphone is the single most requested feature in modern apartment intercom upgrades. It eliminates missed delivery situations, allows residents to grant access remotely, and reduces physical handset wear in units where residents travel frequently. Systems that offer this via direct SIP calling rather than a proprietary app tend to be more reliable long term.
Visitor Log and Entry History
An auditable log of who called which unit and when is a liability management tool as much as a security feature. For property managers dealing with building security incidents, having timestamped entry records from the intercom system provides concrete documentation that simple buzzer systems cannot offer.
Integration with Smart Locks and Biometric Access
Buildings that pair their retrofit intercom system with smart locks or facial recognition access control on secondary doors gain a layered security posture that is genuinely difficult to circumvent. UnikCCTV offers intercom systems that integrate directly with biometric panels, allowing a single platform to manage both visitor entry and resident access across multiple building zones.
Time Attendance and Occupancy Tracking
For mixed-use buildings or commercial properties, time attendance clocks integrated with the same access control system provide workforce data alongside security data. This is a feature set that competitors focused purely on residential intercom hardware do not consistently offer, and it creates meaningful value for property managers running buildings with on-site staff or retail tenants.
The data consistently shows that property managers who implement a full apartment intercom upgrade with access control integration report a reduction in unauthorized building access incidents of 60 to 80 percent within the first year. That is not a marginal improvement. It is a fundamental change in building security posture that justifies the capital investment on safety grounds alone, before any consideration of tenant satisfaction or insurance premium impacts.
Frequently Asked Questions
Can I retrofit a modern intercom system without replacing all the wiring in my apartment building?
Yes, in most cases. If your building has existing two-conductor home run cables from the lobby to each unit, a two-wire intercom retrofit system can reuse that existing wiring to carry power, audio, and video signals simultaneously. The key requirement is that the cables are intact, have no shorts, and measure at or above 9V DC at the farthest unit when tested. Buildings with damaged, missing, or proprietary wiring will require new cable runs or a wireless solution.
How long does a retrofit intercom installation take in a 50-unit apartment building?
A professional installation in a 50-unit building typically runs 3 to 5 working days, assuming the wiring audit has been completed in advance and all equipment is on site before work begins. Buildings with complex wiring conditions, hard-to-access vertical chases, or significant concrete construction can extend that timeline. The wiring audit itself, done separately before the installation window, adds 1 full day for a building of that size.
What is the difference between a two-wire intercom retrofit and an IP-based intercom system?
A two-wire intercom retrofit uses your existing copper wiring to connect apartment handsets or indoor monitors to the lobby panel using digital multiplexing technology. Residents interact via a dedicated in-unit device. An IP-based system connects the lobby panel to the internet and routes visitor calls to resident smartphones via an app. The two-wire approach is more reliable and does not depend on internet connectivity, while the IP approach eliminates in-unit hardware and supports remote access from anywhere.
Do I need a permit to replace the intercom system in an apartment building?
Permit requirements vary by jurisdiction, but in most municipalities, modifying door access control in a multifamily residential building requires a low-voltage electrical permit at minimum. If the project involves modifications to fire egress doors or electronic strikes on fire-rated assemblies, additional permits and inspections are typically required. Always check with your local building department before starting work. Proceeding without required permits creates liability exposure and can result in mandatory removal of installed equipment.
What happens to residents who do not have a smartphone when the building switches to a mobile-based intercom system?
Any building that transitions to a smartphone-based intercom system must provide an alternative access method for residents without smartphones. This typically means a key fob, PIN code pad, or dedicated in-unit paging device that connects to the lobby panel independently of the mobile app. Failing to provide this alternative can violate fair housing obligations in jurisdictions that protect residents from discriminatory access conditions. A well-designed apartment intercom upgrade always includes a hardware fallback option.
Can a retrofit intercom system integrate with the building’s existing CCTV cameras?
Yes, many modern IP-based and hybrid intercom systems support integration with existing CCTV infrastructure through ONVIF protocol compatibility or direct NVR connections. This allows lobby camera feeds to be monitored through the same management platform as the intercom system, creating a unified security view. UnikCCTV systems are designed with this integration in mind, supporting both intercom and CCTV surveillance under a single platform where the building’s CCTV equipment meets the required specifications.
If you have completed a retrofit intercom project in an older building, share what wiring scenario you encountered and how you solved it. Your experience may help another property manager avoid the same surprises.
References
- Statista: global smart building and access control market size data and growth forecasts
- Forbes: property technology trends and multifamily real estate investment analysis
- U.S. Department of Energy: building systems integration and low-voltage electrical infrastructure guidance
- U.S. Department of Housing and Urban Development: fair housing standards and residential building access compliance requirements
- McKinsey and Company: smart building technology adoption and operational efficiency research for commercial and residential real estate


 No products in the cart.