Most security camera installations fail not because of poor equipment, but because of poor placement decisions made before a single screw is turned. Studies from the Urban Institute show that visible, well-positioned surveillance cameras reduce property crime by up to 50% in monitored areas. Yet a surprising number of property managers and homeowners install cameras that cover decorative landscaping while leaving entry points completely blind. This guide covers CCTV camera placement with the precision that real-world security demands, whether you are protecting a single-family home, a multi-unit apartment complex, or a commercial facility.
Table of Contents
- Quick Takeaways
- Why Placement Outranks Camera Specs
- The Four Zones Every Property Needs Covered
- Security Camera Installation: Height and Angle
- Camera Placement by Property Type
- Comparing Camera Placement Strategies
- Common Placement Mistakes and How to Fix Them
- Integrating Cameras with Access Control and Intercoms
- Frequently Asked Questions
- References
Quick Takeaways
| Key Insight | Explanation |
|---|---|
| Entry points first, always | Front doors, back doors, and ground-floor windows account for over 80% of burglary entry points. These must be your camera priority before anything else. |
| Mount height of 8 to 10 feet is optimal | This height captures clear facial features while keeping cameras out of easy reach for tampering. Going higher than 12 feet reduces identification quality significantly. |
| Avoid backlighting at all costs | Placing a camera facing a bright window or the sun creates silhouette footage that is legally and operationally useless. |
| Overlap camera fields of view | A single camera leaves blind spots. Two cameras with overlapping coverage eliminate dead zones and provide redundancy if one fails. |
| Parking areas need dedicated cameras | Vehicle theft and vandalism are consistently among the top reported property crimes. A dedicated wide-angle or PTZ camera for parking lots is not optional for commercial properties. |
| Pair cameras with door entry systems | A camera at a gate or door entry system gives you both visual and access logs, which is far more defensible evidence than either system alone. |
| Indoor cameras need different lenses than outdoor ones | Indoor cameras in corridors work best with varifocal lenses for long-range coverage. Wide-angle fixed lenses suit open lobbies and reception areas better. |
Why Placement Outranks Camera Specs
A 4K camera pointed at the wrong spot captures high-resolution footage of absolutely nothing useful. This is not a theoretical concern. It is the single most common failure point seen in security audits across residential and commercial properties alike.
The FBI’s Uniform Crime Reporting data consistently shows that the majority of property crimes happen at predictable points of entry and exit. Camera placement that maps directly to those points will outperform an expensive camera system with poor positioning every single time. Investing in the right placement strategy first makes every dollar spent on equipment work harder.
Before purchasing any camera, walk your property and identify every point where a person could enter or exit undetected. That map becomes your installation blueprint.


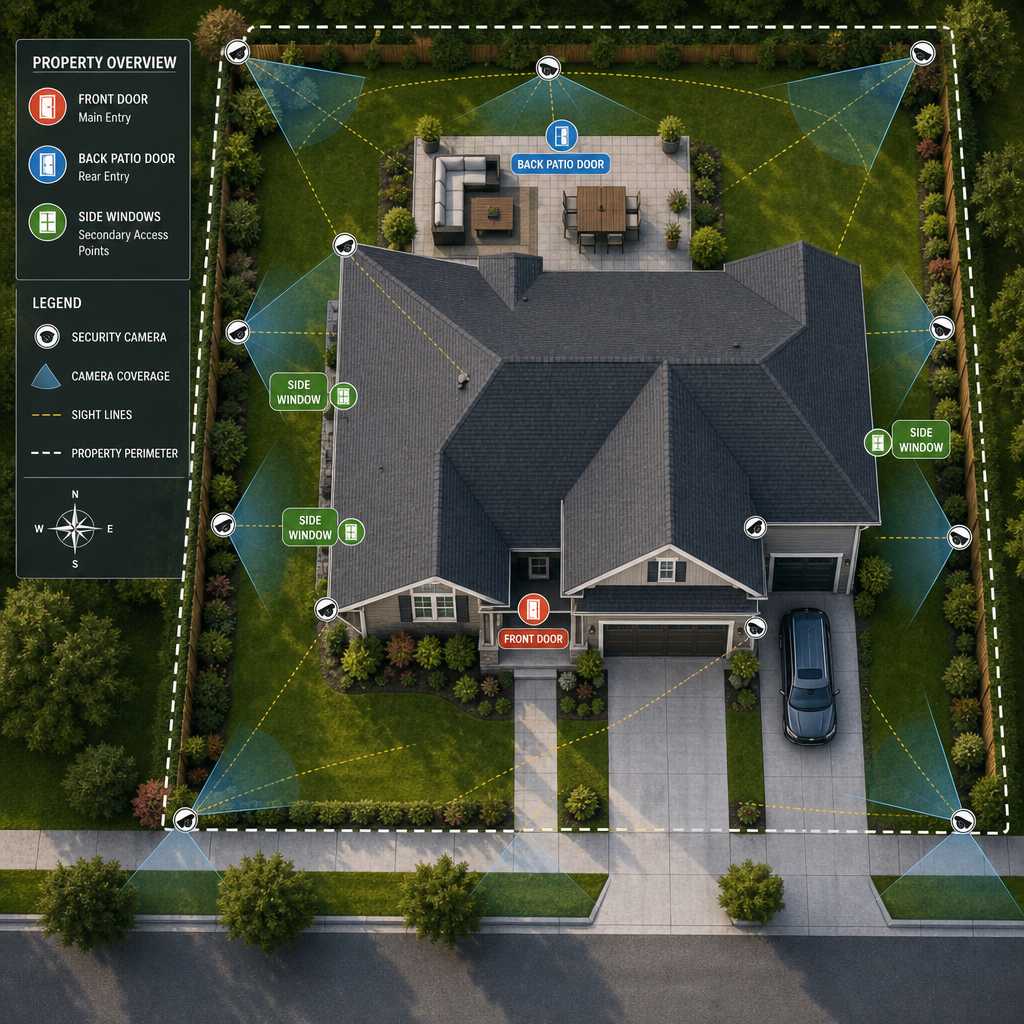
The Four Zones Every Property Needs Covered
Regardless of property size, every effective surveillance layout addresses the same four zones. Skipping any one of them creates the kind of gap that an opportunistic intruder will find faster than you think.
Zone 1: Primary Entry and Exit Points
Front doors, back doors, and any gate access points are non-negotiable camera locations. Each camera here should capture a clear, head-on view of anyone passing through. Position cameras so they catch faces, not just the tops of heads.
At UnikCCTV, clients with intercom systems and smart door entry equipment benefit from pairing a camera directly above or beside the intercom panel. This creates a time-stamped visual record that matches every door release event, which is invaluable for tenant disputes or security incidents.
Zone 2: Perimeter and Boundary Lines
Fences, walls, driveways, and property lines represent where a threat first appears. Perimeter cameras should have wider fields of view, typically 90 degrees or more, to track movement along the boundary rather than focusing on a single point.
For properties using gate access controls, a camera mounted to cover the approach lane plus the gate mechanism itself gives you two-way accountability: who requested access and what actually happened at the gate.
Zone 3: High-Value Interior Areas
Server rooms, cash handling areas, inventory storage, and reception desks all qualify as interior zones that demand dedicated cameras. In residential settings, this translates to garages, home offices, and any room containing valuables.
Do not make the mistake of covering entire hallways with a single camera at one end. Two cameras facing each other from opposite ends of a corridor eliminate the blind spots that a single unit always creates.
Zone 4: Parking and Vehicle Areas
Parking lot surveillance is consistently underestimated by property managers until an incident occurs. A wide-angle or PTZ camera mounted at elevation, typically on a pole or roofline, should cover rows of vehicles rather than individual spaces. Night vision capability is essential here since most vehicle-related crimes happen in low-light conditions.
Security Camera Installation: Height and Angle
Height and angle are the two variables that most installers get wrong, and neither mistake is obvious until you review footage after an incident. By then, it is too late to adjust.
The 8 to 10 Foot Rule
Mounting cameras between 8 and 10 feet off the ground hits the balance point between facial recognition quality and tamper resistance. Below 7 feet, a camera is easy to redirect or vandalize. Above 12 feet, the downward angle compresses facial features into an overhead view that is practically useless for identification purposes.
For outdoor dome cameras covering wide areas, 10 feet is the practical sweet spot. For bullet cameras covering a specific approach path, 9 feet with a slight downward tilt of 15 to 20 degrees produces the clearest head-on facial capture.
Horizontal Field of View and Lens Selection
A common mistake is choosing a wide-angle lens for every location. Wide-angle lenses, typically 90 to 120 degrees, work well for open areas like lobbies, parking lots, and intersections. For corridor coverage or monitoring a specific doorway from distance, a narrower lens in the 50 to 70 degree range produces sharper, more identifiable footage at range.
Varifocal cameras, which allow you to adjust the focal length after installation, are worth the added cost in commercial environments where you may need to fine-tune coverage after reviewing initial footage.
“The goal of a surveillance system is not to record everything. It is to record the right things clearly enough to act on them.” – Security Industry Association, Physical Security Standards Committee
Pro tip: Before finalizing camera positions, have a colleague walk through each coverage zone while you monitor the live feed. Adjust angle and tilt before mounting permanently. This 20-minute test prevents hours of rework later.
Camera Placement by Property Type
The zones described above apply universally, but the specific placement decisions within those zones vary by property type. A single-family home has fundamentally different coverage requirements than a 200-unit apartment building or a retail operation.
Single-Family Homes
For residential installations, four to six cameras typically cover a property comprehensively. Priority positions are the front door, back door, garage entry, and driveway. One additional camera covering the side yard that is least visible from the street addresses the approach path most often used by intruders.
Wireless cameras work well in residential settings where running cable is impractical. UnikCCTV’s wireless transmitter range of products supports installations where cable routing through finished walls would be disruptive.
Apartment Buildings and Multi-Unit Properties
Property managers overseeing apartment buildings face a layered security challenge: common areas, building entry points, parking structures, and individual unit entrances all require coverage. The lobby camera must capture every person entering regardless of which key or access credential they use. This pairs naturally with a wired intercom or video intercom system at the building entrance.
Elevator interiors, stairwells, and mail rooms are frequently overlooked. Package theft in particular has become a significant liability issue for apartment operators, and a camera covering the mail area is now a baseline expectation for tenants in most markets.
Commercial Properties and Office Buildings
Commercial installations must account for after-hours vulnerability as well as daytime operational concerns. A business that closes at 6 PM has a far different threat profile between 6 PM and 6 AM than during business hours.
Loading docks, emergency exits, and server rooms are the locations most frequently missed in commercial camera layouts. Emergency exits in particular present a challenge: they must remain accessible but they are also common unauthorized entry and exit points. A camera directly above the push bar of every emergency exit is a standard requirement in any serious commercial security design.

Comparing Camera Placement Strategies
Three primary approaches to camera layout planning are used across the security industry. Each has legitimate applications, but they are not equally effective for every property type.
| Placement Strategy | Best Use Case | Key Limitation |
|---|---|---|
| Zone-Based Coverage (described above) | Most residential and mid-size commercial properties. Provides systematic coverage of all critical areas without camera overload. | Requires an upfront site assessment. Cannot be done efficiently by guessing camera positions from a floor plan alone. |
| Perimeter-First Coverage | Large properties like warehouses, industrial facilities, and campuses where the outer boundary is the primary threat vector. | Interior vulnerabilities go unaddressed. A threat that bypasses the perimeter, such as an insider threat or a tailgating incident, is invisible to this system. |
| Incident-Reactive Placement | Properties adding cameras after a specific incident. Addresses a known weak point quickly. | Highly reactive and leaves systematic blind spots uncovered. Rarely produces a coherent, property-wide security posture. |
In practice, zone-based coverage is the right starting framework for the vast majority of UnikCCTV’s client base, including homeowners, apartment managers, and small-to-medium business operators. Perimeter-first makes sense as a layer added on top of zone coverage for larger facilities, not as a replacement for it.
Common Placement Mistakes and How to Fix Them
These are the errors seen repeatedly in security audits, and they are all avoidable with a bit of planning before installation begins.
Pointing Cameras Into Light Sources
A camera facing a window, a sunrise, or a bright exterior light source produces footage that shows nothing but glare and silhouettes. The fix is simple: always position cameras so the light source is behind the camera, illuminating the subject rather than the lens.
For 24-hour coverage of low-light areas, choose cameras with infrared night vision or color night vision capability rather than relying on ambient lighting that may not be consistent.
Covering Too Much Area With One Camera
A wide-angle camera mounted to capture an entire parking lot will produce footage where faces are the size of pixels. Surveillance camera guides universally recommend sizing your field of view to the task. If facial identification matters, the camera must be close enough and angled correctly to capture that level of detail.
Use one camera for area awareness (wide angle, elevated) and a second camera for identification at key access points (narrower angle, mounted at face height). Both serve different forensic purposes.
Ignoring Cable and Power Vulnerability
A camera whose cable runs visibly along an exterior wall for 20 feet before reaching the mounting point is a camera that can be disabled in seconds. Cable conduit and concealed routing are not cosmetic choices. They are part of the physical security design.
Pro tip: For properties where cable concealment is difficult, PoE (Power over Ethernet) cameras reduce the number of exposed cable runs by combining power and data in a single cable. This cuts both installation time and cable vulnerability compared to traditional setups requiring separate power runs.
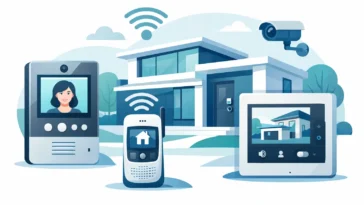
Integrating Cameras with Access Control and Intercoms
A camera system that operates independently from your access control infrastructure is leaving the most valuable data correlation on the table. The combination of a visual record with an access event log creates accountability that neither system alone can provide.
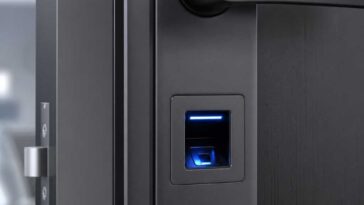
At every door entry point equipped with a smart lock, keypad, or biometric reader, there should be a corresponding camera. When an access event is logged, the camera footage tied to that timestamp tells you who actually used the credential, not just that it was used. This distinction matters enormously in environments where credential sharing is a compliance or liability concern.
Wireless intercoms with built-in cameras, which UnikCCTV carries across its intercom product range, serve double duty at building entrances: they handle visitor communication and simultaneously capture footage of every visitor before they are granted access. For apartment buildings and gated communities, this integration reduces the need for separate doorbell cameras and intercom units at the same location.
Facial recognition locks, another product category available through UnikCCTV, add a third layer: the access credential, the access log, and a biometric match all tied to the same event. For high-security interior rooms like server areas or executive offices, this combination represents the most complete access audit trail currently available for commercial applications.
“Integrated security systems, combining video surveillance with access control, are 3.5 times more effective at deterring unauthorized entry than standalone camera systems.” – Security Management Magazine, Physical Security Report
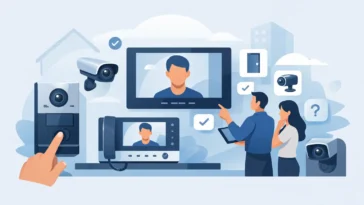
The practical recommendation for any property using or planning to use access control equipment is to design the camera system at the same time. Retrofitting camera coverage around existing access control hardware is always more expensive and produces less clean integration than designing both together from the start.
Frequently Asked Questions
How many cameras does a typical home need for complete coverage?
Most single-family homes achieve comprehensive coverage with four to six cameras. The front door, back door, garage entry, driveway, and at least one side yard camera cover the statistically most vulnerable points. Larger properties or homes with additional outbuildings or detached garages will need additional units, but the placement logic remains the same: entry and exit points first, perimeter second.
Can I install CCTV cameras myself or do I need a professional?
Wireless cameras in residential settings are genuinely DIY-friendly, provided you do the site assessment properly before committing to mounting locations. Wired systems in commercial buildings, or any installation requiring cable routing through walls, conduit work, or integration with access control hardware, should involve a professional. A bad installation on a wired system can cost more to fix than the original professional installation would have.
What is the legal requirement for notifying people that cameras are present?
In the United States, requirements vary by state. Most states require that security cameras not be placed in areas where individuals have a reasonable expectation of privacy, such as restrooms or changing rooms. For commercial properties, posting visible signage notifying visitors of surveillance is both a legal best practice and a deterrent. Always consult your local regulations or a legal professional for jurisdiction-specific requirements before installing cameras in employee or tenant areas.
Do cameras need to be visible to be effective as a deterrent?
Yes. Research consistently shows that visible cameras reduce crime at the monitored location. Hidden cameras have forensic value after an incident but provide no deterrence benefit beforehand. The practical recommendation is to make primary security cameras visible and supplement with discreet cameras at critical interior points where covert monitoring is legally appropriate and operationally justified.
How does camera placement differ for night coverage versus daytime coverage?
Daytime placement focuses on angle and field of view. Night coverage adds a lighting requirement to the calculation. Every outdoor night-coverage camera must either have its own IR illumination, be positioned within range of adequate exterior lighting, or use a color night vision sensor. Cameras with built-in IR should be tested at full darkness before finalizing mounting position, since IR range and pattern vary significantly between models and can create unlit gaps in what appears to be full coverage during the day.
Should I use the same cameras indoors and outdoors?
No. Outdoor cameras require weatherproofing ratings of at least IP66 to handle rain, dust, and temperature extremes. Indoor cameras do not need this rating, which means you get more optical performance per dollar by using indoor-specific units in controlled environments. Using outdoor cameras everywhere works but wastes budget on weatherproofing that indoor locations do not need.
What camera placement challenges have you run into on your property, and how did you solve them? Share your experience in the comments or reach out to the UnikCCTV team directly for a placement consultation.
References
- Urban Institute research on crime prevention and surveillance effectiveness
- Statista data on property crime rates and security system adoption trends
- Forbes reporting on smart home security technology and access control integration
- NIST guidelines on physical security standards for commercial and government facilities
- Bureau of Justice Statistics national crime victimization survey data on property crimes
 No products in the cart.